There is nothing better and worse at the same time than updating your home. It’s time consuming, money draining, and laborious. But the end result for every project is always complete satisfaction and the warm feeling of turning your house into your home.
For months now I’ve been wanting to upgrade the boys bathroom and the spare bathroom. The wall colors were still the same stock paint from when they built the house 12 years ago, and the hardware in them was just as old. We just finished updating the boys bedroom a couple weeks ago, so the itch to paint their bathroom was getting stronger. But I knew I didn’t want to just paint it, I wanted to change out the towel rack.
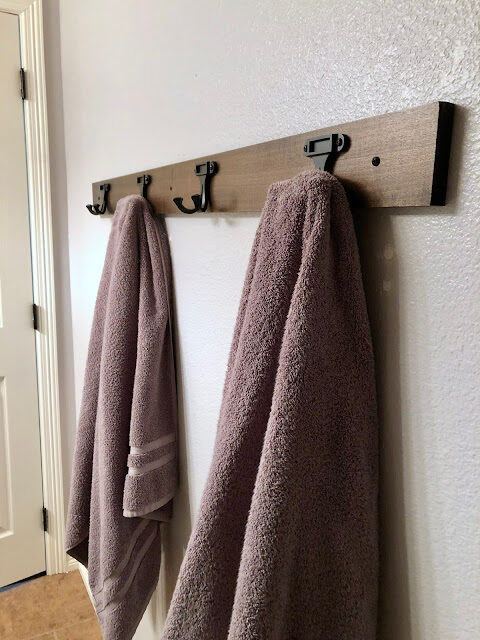
After racking my brain (pun intended) I decided on making our own matching towel racks for their bathroom and the spare. It cost about $30 for each and it looks amazing. I didn’t take photos of each step, but it was so easy I can explain it in this post.
Before we go any further, here is a before and after of the boys bathroom with upgraded paint and the towel rack! The original wall color was a yellowy-tan, and the color we chose to paint is a Valspar brand called White Pepper. It’s the same in the boys room and I LOVE it.

Here’s the simple instructions on how to make this towel rack. Again we did it for 2 bathroom, so I’ll talk about that in the steps.
Step 1) We purchase an 8′ piece of Pine from Lowes and cut it in half (one half for each bathroom). I originally thought I wanted the rack 42″, but the 48″ ended up being perfect, even for a small bathroom. We also purchased the double hooks from Lowes. They have slots to put labels if that’s something you need, but regardless they are beautiful hooks.
Step 2) I already had stain and sealer at home, but if you need to purchase some the smallest can size is perfect. I used dark walnut. I put it on with a sponge brush, let it sit for about 7 minutes, and wiped off the excess. I let it dry overnight before adding the clear coat. Follow instructions for stain and sealant applications.
Step 3) We measured out where the hooks would go and my husband drilled them in. He had to buy separate screws because the ones that came with the hooks were too long. We measured out the hooks so the 2 end hooks are 6″ in from the end, and all 4 hooks have 12″ in between. I hope that makes sense!
Step 4) The husband anchored it into the wall after we marked where I wanted it hung!
It was an incredibly easy project and if I added up the time it took for everything, I would say it was about 1.5 hours total. Super easy, fast, and inexpensive upgrade that looks incredible in the boys and spare bathroom!


ANDRAINO ADAMS
Good articles, Have you heard of Mr Benjamin, Email: 247officedept@gmail.com?–WhatsApp Contact:+1-9893943740–?who work with funding?service they grant me loan of $95,000.00 to launch my business and I have been paying them annually for two years now and I still have 2 years left although I enjoy working with them because they are genuine Loan lender who can give you any kind of loan.