For a good 8 years we had the same Wal-Mart tv stand. It wasn’t horrible but it surely wasn’t anything special. I had wanted to replace it forever but I didn’t want an entertainment center and couldn’t find a tv stand I truly liked. And if I did find one that I thought I would be happy with, my heart would skip a beat from sticker shock. This is where Pinterest came in handy.
I started searching the craft enthusiast website for ideas on how to spruce up my old tv stand, even though I wasn’t crazy about it. As I was researching projects I started to notice a trend called “Ikea hacks”, especially for the popular (then Expedit) Kallax bookshelf. After reviewing a few hacks, I quickly decided this was what I wanted to do. However, I also knew this project needed to be as easy as possible. My husband and I are lacking on tools, time, and to be honest, skills. We ARE learning how to do more projects, but we are still in the “kind-of handy” category. (I’m hoping one day we can say we’ve made it to super handy-land.)
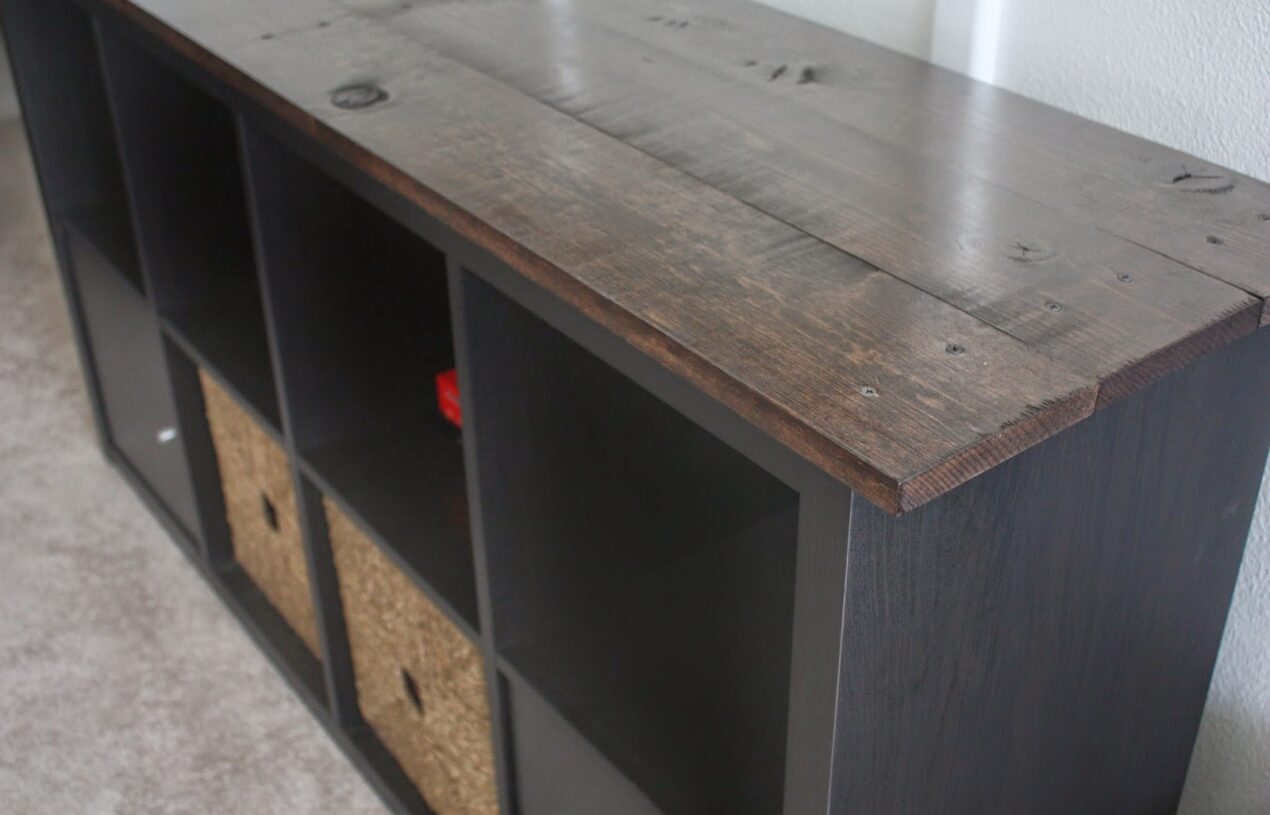
Anyway, as I was researching more and more I realized that super handy folks were using all kinds of crafty tricks and nifty tools to make their Ikea hack projects come to life. I, on the other hand, knew I wanted something much more simple and elegant – wood panels stained and mounted to the top of the shelf. I also wanted them to contrast with the tv stand. The only problem was mounting them…
We thought about using wood glue, but figured that wouldn’t create a strong enough bond to last for years. So we knew we had to use wood screws, but our other concern was wondering if the wood composite in the Ikea shelf would split when a screw would be introduced. Let me save you a lot of time and research here. NOTHING HAPPENED. The screws went in completely fine and the panels are mounted tightly to the shelf.
So here is what we did. Bought and put together the Kallax (Expedit) shelf. #duh. Bought 3-1×8 wood panels from Home Depot and had them cut down to the length we wanted. I thought it would look best if they hung 1″ off each side.
We also got the stain, sealant, and staining brush. My husband put 2 coats of stain (about 24 hours of dry time between each coat) and 1 coat of sealant.
Then he laid the panels on top of the shelf, measured and marked where the screws would go in, and attached the panels! That’s IT! It was so easy and fast (minus the drying time).
I LOVE IT.
I’m thinking of adding a thin wood panel to each shelf. What do you think? I’m also trying to arrange the stuff the best visual way I can. Thoughts?
I’d love to hear your feedback and answer any questions!
Happy hacking,
Laura
Here is a reference of before and after so you can view them side by side. HUGE difference, small change 🙂


Anonymous
This is amazing! It looks so good! My husband and I have different furniture styles and this is the PERFECT compromise within our budget! Thank you so much for posting this Kallax hack!
Laura Sosa
Glad I could help! It wasn't much but made a huge difference in style in the living room!
Clarissa Waldman
This is fantastic! I've been looking for ideas for a kallax hack for a tv console, and I will definitely be doing this. I'm going to attempt to add doors and hairpin legs. What size/type of screws did you use? I'm also new to the handy world, so picking up the same kind that you used would help me tremedously! Thanks!!
paul.t
Amazing 🙂 perfect for fish tank stand.
Laura Sosa
Absolutely!